4/12/2016

Digiprog 3 V4.94 change mileage for Chevrolet Trailblazer

Here is the customer solution to Chevrolet Trailblazer 2002 KM change with Digiprog 3 v4.94 odometer correction tool.
digiprog-3-Trailblazer-mileage-correction-1
Many thanks to a well-known member in GMT nation forum who achieved this.
Digiprog3 and ST 01/2 cable used is China clone.
The entire kit cost $169, with a set of cables and adapters. But i don’t think everyone should buy the entire kit, for the main unit should come with ST01, ST04 cables, which will save $40. Of course you should use st01/ st04 or have other adapters in hand.

And the model to chang mileage:
Chevrolet Trailblazer LTZ 2002

And here is some useful pictures for the same process:
digiprog-3-Trailblazer-mileage-correction-2
digiprog-3-Trailblazer-mileage-correction-3
digiprog-3-Trailblazer-mileage-correction-4
digiprog-3-Trailblazer-mileage-correction-5
digiprog-3-Trailblazer-mileage-correction-6
digiprog-3-Trailblazer-mileage-correction-7
And here is the final result
Before mileage correction
digiprog-3-Trailblazer-mileage-correction-8
After mileage correction with Digiprog3 V4.94
digiprog-3-Trailblazer-mileage-correction-9
digiprog-3-Trailblazer-mileage-correction-10
And here is some notes for doing this properly :-
  • For US users, please make sure to check the Voltage of the adapter before connecting to AC (use the one included with the unit as it’s 110-220 V ). Just to make sure you don’t fry your Digiprog iii programmer
  • Also for US users, Change the netric unit from KM to MPG or Vise Versa from MPG to KM; for European users, before reading or Writing on the Chip
  • Very Very important to connect the programmer clip as per the pictures attached where the Red Color pin in the Clip is Up (See the picture above)
  • Before assembling the cluster back together connect it to the car first and check the mileage reading before installing needles back and installing the whole cluster back to the car
  • Also Very Very Very Important that you always save the old chip data in the DP3 programmer for any thing goes wrong so you can write it back if needed or even if someone fried his chip and needed to install new chip it will be really easy to write it back
  • if you needed any time to restart again or your Digiprog got stuck while working simply take out the Power plug and reinsert it again to restart the programmer (Never ever unplug AC power Plug when odometer correction tool is reading or Writing on the EEPROM CHIP otherwise you will destroy it)

If you are interested, check the small video operation he made here.

4/03/2016

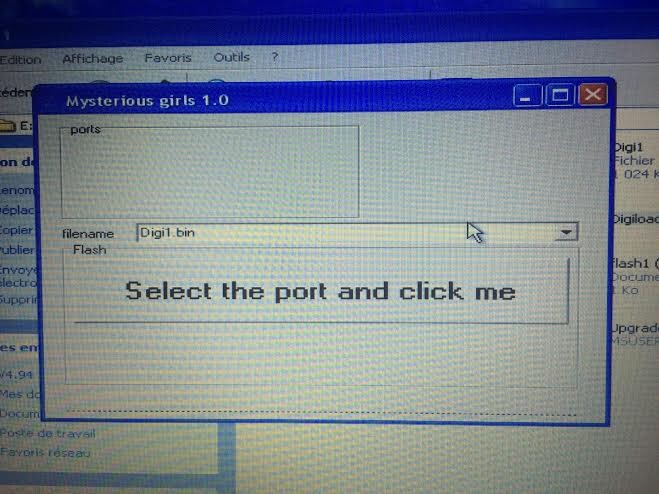
Digiprog 3 V4.94 update error "List index out of bounds"

I bought Digiprog 3 v4.94 update software and followed the instruction to update my digiprog3 on WinXP laptop. But when run Digiloader1.exe file, the windows reports an error "List index out of bounds (-1)" (error screens taken below)


digiprog3-4.94-error-1

digiprog3-4.94-error-2

digiprog3-4.94-error-3

digiprog3-4.94-error-4

digiprog3-4.94-error-5

digiprog3-4.94-error-6
3 possible reasons:
1.You did not disable anti-virus program. Digiloader file was killed by virus.
2.His WinXP is not compatible with the digiprog3 4.94 update software. 
3. The update file is not complete. 

Solution:
Contact your dealer to check if your problem came with files,if yes,ask them to re-send the update file.

http://digiprog3digiprogiii.blogspot.com/2015/12/how-to-update-digiprog3-in-10-steps.html

3/26/2016

Ford F350 odometer correction digiprog 3 pinout

I need help with a 2004 Ford F350 super duty cluster mileage correction. I’m using digiprog 3 v4.94 but i don’t have the diagram or what chip looking for to extract the info from this cluster. So I searched and find some documents.

Here is the Ford F350 digiprog III pinout on the manual book:
Ford-f350-mileage-correction-digiprog-1
What is needed plug 51.
FORD VAN F350
Remove the cluster and it.
Connect shown in the photo’s below the plug 51 with the
marked soldering points. The white marked soldering points among themselves
and connect to the white wire from St. 51st (Photos s. Next page)
Select the program: cars / trucks – FORD – F350.
The DIGIPROG denotes old / incorrect Mileage.
program and completed the new / correct Mileage.
Ford-f350-mileage-correction-digiprog-2Ford-f350-mileage-correction-digiprog-3
But my cluster looks different from the pic in the manual, here is mine.
Ford-f350-2
Ford-f350-1
Then a DigiProg expert pointed me the proper solution.
Use the BDM points mate 4 wires
BDM-pinout
Do like in clusters picture. use connector ST48 and wire to the 6 pin point pad and read thru ford f350 or thru eeprom programmer set to mcu 912 4k.
Digiprog3 v4.94 ST51 is only for 12 volt if you going to power entire board for f350 should be using st48 which gives 5volt 12volt to a mcu and youll be smoking in no time.

2/24/2016

Digiprog 3 DigiProg III "ERROR NO CONNECTION" solution

Hi,
I have been using Digiprog 3 v4.94 mileage programmer from obdii365.com for several months. The tool used to work well. But today, when I tried to use it to correct mileage for an Audi A4 of the year 2000, a window popped up, saying “ERROR NO CONNECTION”. I have also tested it on another A4 of the year 2006, and the error message showed up again. What could be the problem? Is the tool broken? Below is a photo of the problem. Please help. Urgently. Thanks.
David
————————————————————————————–
Dear David,
According to the error message you provide, I guess you are connecting the tool via OBD2 port, right? However, according to Digiprog3 odometer correction tool manual book, to program mileage for most cars before 2008, you will have to disassemble the dashboard and get access to the mileage chip. Then you will need to use ST01, ST04 or other cables rather than OBD2 cable to clip the chip and let the chip communicate with the DP3.
digiprog-3-no-connection

The Digiprog iii will tell you if you need to disassemble the dashboard, as well as which cable you should use to do mileage programming for the car.
Solution: You can disconnect the tool, connect it to your car again, and pay attention to system prompts to determine how to do the programming.
Best regards

2/17/2016

Digiprog 3 odometer correction tool Access denied solution


I have tested digiprog3 v4.94 odometer correction tool on Opel Astra 2013 and Audi A8L 2007. 


DigiProg3 Prompt to Plug 16 connectors
So I connect the ST16 OBD II Diagnostic connector

My car running Old 98129 miles

After manually enter the new mileage, the DigiProg 3 display an error message ACCESS DENIED
Actually 98000 miles
 digiprog-3-access-denied
digiprog-3-access-denied-2


Then I have test some other models Chevrolet Cruze 
VW Polo 2010 all via OBD way, still not luck to get them well communicated.


EEPROM changed
Was 25160 became 24s16.


24s16 changed at 95160,
digiprog-3-adapter

2/10/2016

Digiprog3 v4.94 change Isuzu D-Max odometer

Recently a obdii365.com customer has successfully programmed his Isuzu D-MAX odometer with Digiprog 3 Digiprog III odometer correction tool. Below are some pictures he shared us about how he did the job:
digiprog-3-change-isuzu-mileage-1
digiprog-3-change-isuzu-mileage-2
digiprog-3-change-isuzu-mileage-3
digiprog-3-change-isuzu-mileage-4
digiprog-3-change-isuzu-mileage-5
digiprog-3-change-isuzu-mileage-6
Digiprog3 V4.94

1/25/2016

Digiprog 3 V4.94 Change KM on Toyota Hilux 93c66

Obdii365.com engineers today tested Digiprog 3 v4.94 odometer correction tool on Toyota hilux 93c66. Here displays the test procedure.

Tool used: Digiprog3 v4.94 odometer programmer
Model: Toyota HILUX C66

Procedure of odometer correction with Digiprog 3 master:
Adapter connection:

Digiprog-3-V4.94-Toyota-hilux-93c66 (1)
Digiprog-3-V4.94-Toyota-hilux-93c66 (2)
Pin out connection:

Digiprog-3-V4.94-Toyota-hilux-93c66 (5)
Digiprog-3-V4.94-Toyota-hilux-93c66 (6)
TOYOTA
SELECCIONE MODELO
HILUX C66
EEPROM: 93SC66
VIEJO: 132005KM
Digiprog-3-V4.94-Toyota-hilux-93c66 (3)
COMPRUEBE VALOR ESCRITO – 61132KM
Digiprog-3-V4.94-Toyota-hilux-93c66 (4)
Mileage is changed successfully, from 132005KM to 61132KM.

NOTE: Tips for Using Digiprog III:
  1. Always connect the Eeprom to the ST01 or ST04 before you connect to the DigiProg this will avoid Electro static feedback (ESD).
  2. Never solder the connections whilst the lead is connected to the programmer, this will damage the DigiProg.
  3. Always keep your DigiProg 3 in its case when not in Use & keep it in a dry environment at night (don’t leave it in the trunk of your car) If you are using solvents to remove lacquers’ from Eeprom’s ensure that they are cleaned
  4. completely as the solvent can damage the clips.